Today you’re going to learn how to create a popup with Elementor for your WordPress website by using Royal Elementor Addons.
Check out our video tutorial down below:

First things first:
To follow along with this go-to guidebook for adding Mega Menu to your Elementor website, you will need to install Royal Elementor Addons (500,000+ active installations).
Fortunately, this is as easy as it sounds.
Click Add New Plugin in your dashboard’s Plugins section.
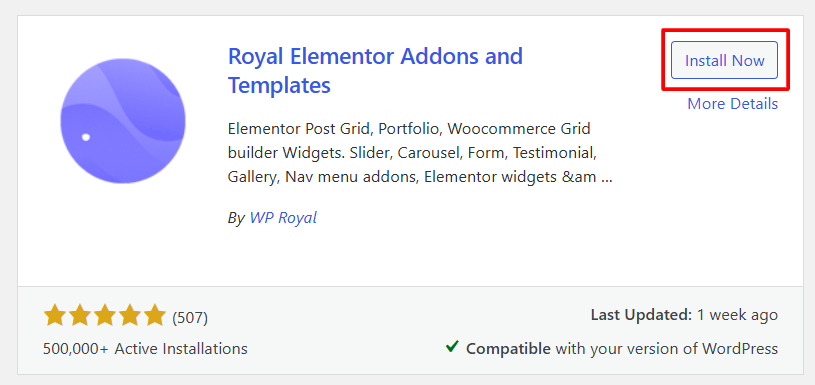
Search for Royal Elementor Addons, click Install Now and activate the plugin.
Now you are ready to learn how to create email subscription popups, promotion sales, countdown popups and many more.
Popups could be displayed on page load, page scroll, when visitor decides to leave the page or when a user clicks on a button.
Basically, it comes with all kinds of features you might need to create a popup.
But before you start creating your Elementor popup, let’s preview a great feature that comes with Royal Elementor Addons — popups Library.
Keep reading…
Premade Popups: Save Time with Ready-to-Use Templates
If you click on the Royal Elementor Addons icon, it will take you to the library of ready-made popups that you can directly import with just one click.
Choose the one you like, click on it to preview and finally click on an Insert button.
Now let’s dive into creating an Elementor popup.
Step 1. Create an Elementor Popup Step-by-Step
There are different styles of Elementor popups available:
- a full screen popup
- a modal window
- slide in popup
- yes/no popup
- cookies consent
- many others
As you can see there are no limits of what you can do when building an Elementor popup.

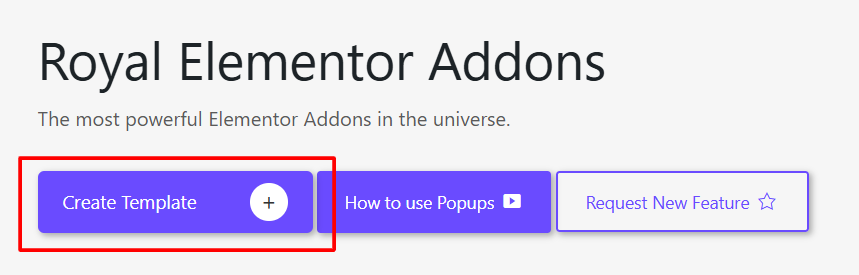
To create a popup you need to go to the WordPress dashboard and in Royal Elementor Addons click on Popup Builder.
Click on Create Template, give it a name and click on create template.
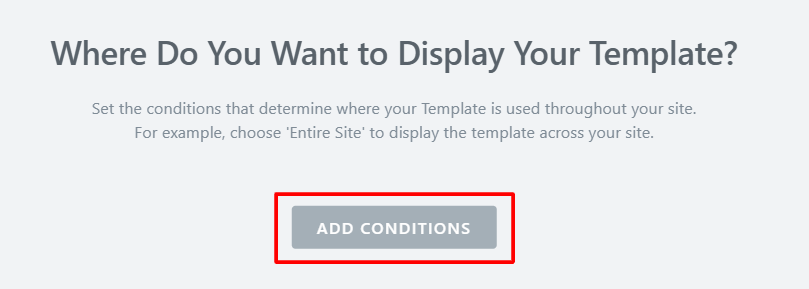
Next you need to choose where you want to display your template.
So click on Add Condition.
Since it’s a free version of Royal Add-ons you can only choose Entire Site feature.
Save conditions and it will take you to the popup editor.
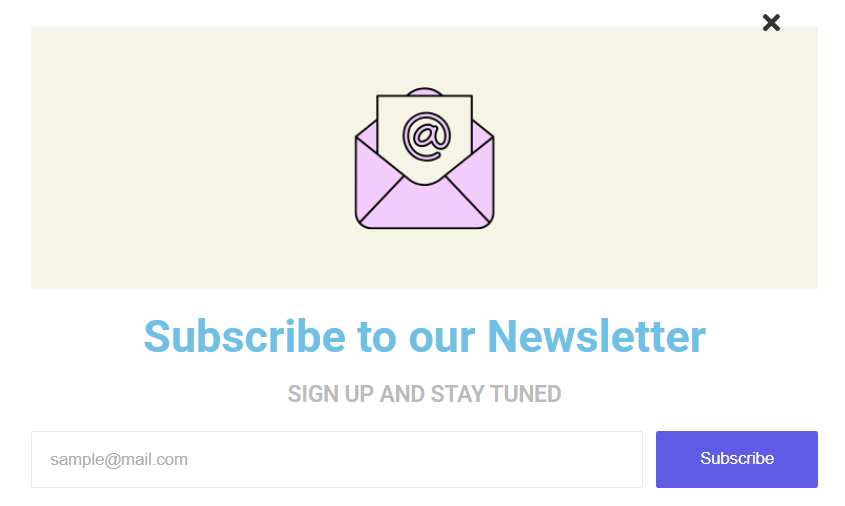
Let’s create your Elementor popup for an email subscription.
Click on Add New Container button and choose the structure of your layout.
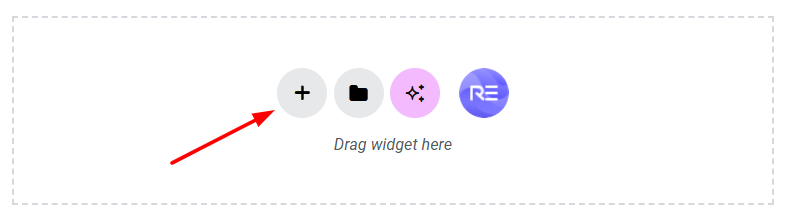
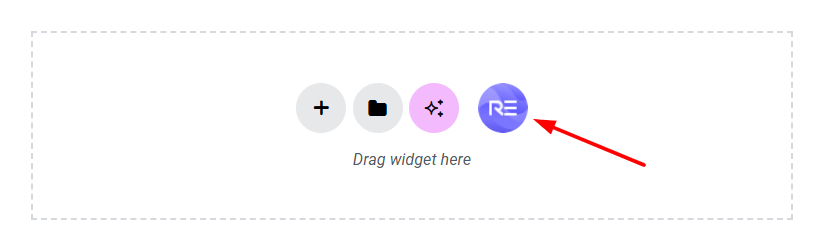
Now go to the widgets list by clicking the “+” icon in the center of your container.
Drag and drop an image widget into the container.
Next you need to add some text to your popup.
So again drag and drop the header widget. You can change its content, alignment, tag, size and font weight.
Now let’s add a MailChimp subscription widget (or any other widget).
Congrats!
You’ve just built your email subscription Elementor popup!
Step 2. Elementor Popup Settings Mastery
Show Again Delay: Prevent Annoying Popups & Improve UX
Let’s go back to the popup settings and the first option you have is to choose how the popup opens up.
You’re probably wondering… WHERE IS THE SETTINGS BUTTON?!
Well, it’s right in the middle of the top toolbar.
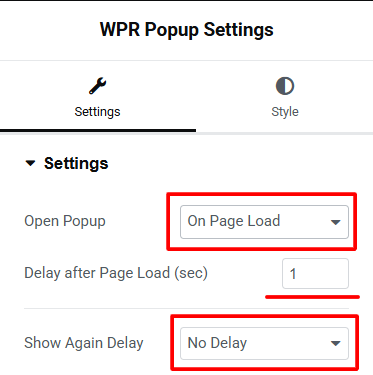
In a free version there’s only one option and that’s On Page Load.
Next feature allows you to choose the time of the delay between the page load and popup display.
If you want to display your popup again to your visitors once they close it you have a few options to choose from.
Otherwise leave it to No Delay.
Layout Settings: Customize the Perfect Popup Design
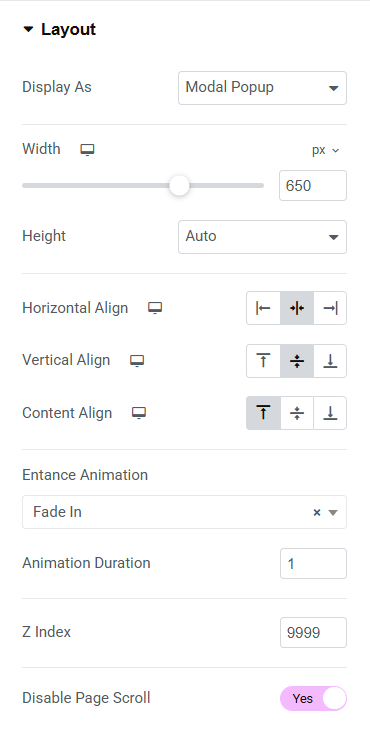
In layout section you can choose how you want your Elementor popup to be displayed.
You can change the background Width and Height (and choose between pixels and percent).
There are all kinds of alignment options that you can play with.
There are also tons of Entrance Animations that you can choose from (you can change it’s duration).
And finally, Z Index is what determines that your popup will always stay on top of other elements of your page.
You don’t want it to be overlaid by other elements like sticky navigation or others.
So always make sure that it is set to a very high number.
If you want your pages not to be scrollable when popup is displayed you can simply activate the Disable Page Scroll feature.
Overlay Settings: Control Background Effects for Better Engagement
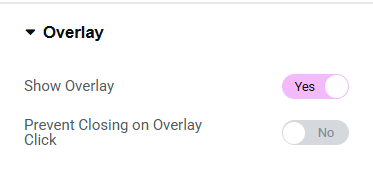
Let’s move on to the Overlay section.
Here you can choose if you want to show the overlay or not.
There’s also an option to prevent the closing of the popup when someone clicks on the overlay.
So if you set it to Yes, then the only option to close the popup will be to click on the close icon on it.
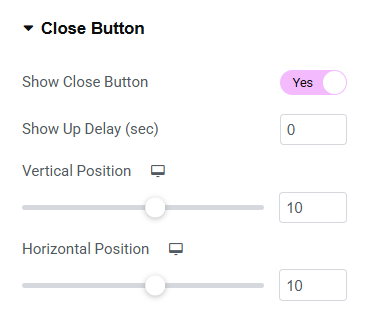
Close Button Settings: Optimize User Experience & Conversions
Speaking of which.
If you go to the Close Button settings, you can choose if you want to display it at all or not.
There’s also an option to delay its show up.
You can choose the position of the close button (vertical or horizontal).
Styling Settings: Make Your Popups Visually Appealing
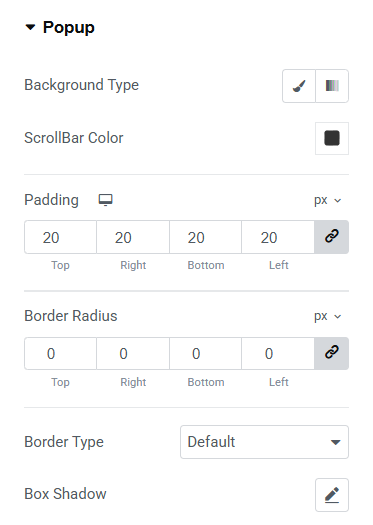
Now we move on to Style section where you can change the Background Type of your popup, change the color or add an image as a background.
There’s also an option to change the color of the ScrollBar.
There are standard things like Padding and Border Radius as well as Border Type and Box Shadow.
Again in Style section there are Overlay and Close Button settings where you can change the color or set the image as a background and stylize the close button.
Popup Trigger Button: Maximize Clicks with Smart Placement
Now I want to overview a really important feature related to Elementor popups — it’s called Popup Trigger.
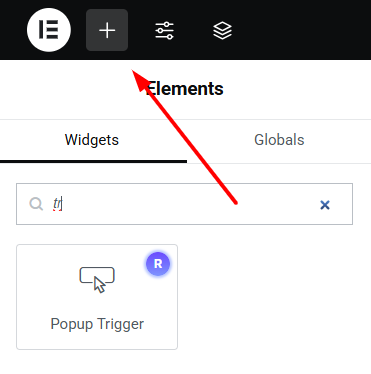
Click on the “+” icon in the top left corner of your screen to Add Element.
Search for Popup Trigger and drag and drop it into your popup.
This feature could be really handy if you want to add a button to your popup, which will trigger some kind of action from a customer.
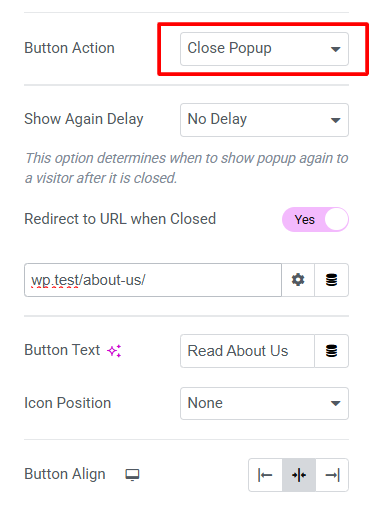
But first let’s see how Close Popup action works.
It is almost identical to Close Button but has some additional settings like Show Again Delay or Direct to a Specific URL when closed.
So you can paste a URL, change the button text and choose the position of the button.
Now if someone clicks on the button it will redirect them to the URL, which you’ve just specified.
There are two other Button Action options:
Close Permanently, which option will close the popup – you guessed it right – permanently.
And Go Back to Referrer — this feature will take your visitors to the page or website from where they landed on your website.
Advanced Elementor Popup settings: Timed Display, User Roles & Device Targeting
But that’s not all…
Before we dive in the Pro features of your Elementor popup, let’s review all the options in settings section.
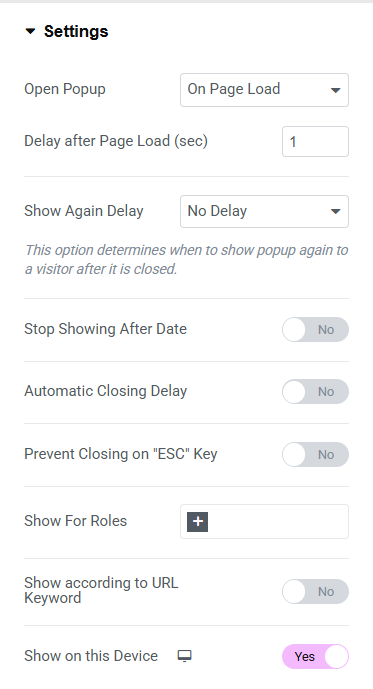
Stop Showing After Date is a great option if you want your Elementor popup to be automatically disabled after a certain date.
Now, if you really want to annoy your users you can set Automatic Closing Delay on 10 seconds for example and they won’t be able to close the popup for the eternity of 10 seconds (I would not recommend doing it!).
If you want to prevent closing your popup when someone presses on Escape key, set the option Prevent Closing on “ESC” Key as active.
Another great feature that comes with the Pro version is to show the popup based on user roles.
For example, maybe you want to show the popup to only guests or subscribers (you can add multiple roles as well).
If activated Show According to URL Keyword will display the popup only if the page URL contains a specific keyword.
Show on This Device is another nice feature, which can be used if you don’t want your popup to be displayed on a specific device.
PRO Features: Unlock Advanced Tools for High-Converting Elementor Popups
It’s time to overview the Pro features of your Elementor popup.
We’ll start from Custom Trigger.
If you want your Elementor popup to be displayed when someone clicks on a certain element of the page (like a button, for example) you need to add a CSS ID to that element.
Let’s take the example of a button.
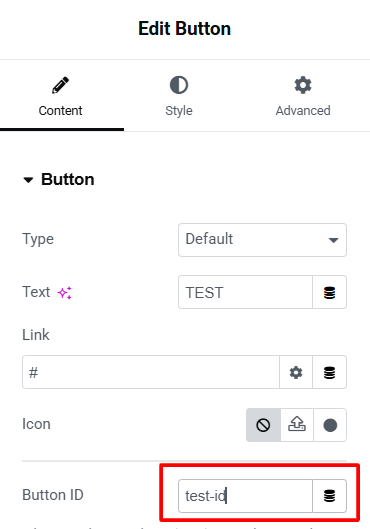
Go back to your website and click on the button that will open the popup.
Paste an ID in Button ID field (keep in mind that it has to be without the hash symbol).
Save the changes and go back to the dashboard.
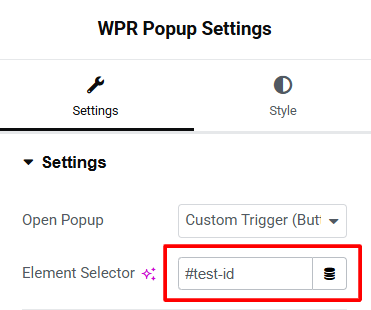
Open your Elementor popup editor and enter the same ID in Element Selector field (this time you have to add the hash symbol).
Now if we click on the button it will display your popup.
Another Open Popup option is After User Exit Intent, which triggers the popup display whenever a site visitor decides to leave the page (or more specifically — mouse cursor goes out of the page window).
After User Inactivity option will trigger the popup display if a visitor is inactive for some time (you can specify the time).
If you set Open Popup feature on After Specific Date option, your popup will only show up after the date and time you specify.
On Scroll to Element option displays the popup when a certain section or element of your page is visible in the browser window (and once again you need to assign an ID to the section).
The very last option that we’ll review in this guide is On Page Scroll where you can specify the percentage of the page length when the popup will automatically be displayed.
That’s it for this guide.
If you have any questions please comment below or go to our support forum.
You can download the Plugin or upgrade to the Pro version on the Home page of our website.
See you in the next one.